Have you ever created a perfect garment pattern… only to realize it fits just one size?
And then comes the real challenge.
DOWNLOAD YOUR FREE CAD PATTERN DRAFTING GUIDELINE
“How do I turn this into multiple sizes without starting all over again?”
If you’ve ever asked yourself that question, you’re not alone.
Pattern grading is one of the biggest hurdles for many designers.
But here’s the good news.
With digital pattern grading, what used to feel complicated can now become structured, accurate, and even enjoyable.
Whatever made you click on this topic, I’m glad you did.
Because once you understand how to use pattern grading software and build a proper fashion CAD grading workflow, you unlock the ability to create patterns that work across multiple body sizes—without guesswork.
What Is Digital Pattern Grading?
Digital pattern grading is the process of creating different sizes from a base pattern using CAD software.
Instead of manually adjusting each pattern piece, you use pattern grading software to scale your design based on measurement rules.
This allows you to create size ranges such as the following:
- Small
- Medium
- Large
- Plus sizes
All from a single base pattern.
Using fashion CAD grading, designers can maintain consistency across all sizes while saving time.
Why Pattern Grading Is Important in Fashion Design
Think about this for a moment.
Your design may look perfect in one size.
But real customers come in different shapes and proportions.
Without proper grading, your garment may:
- fit too tight in larger sizes
- look loose in smaller sizes
- lose its original shape
This is why sewing pattern grading is essential.
And when done digitally, it becomes far more precise.
How CAD Software Makes Pattern Grading Easier
OTHER RELEVANT BLOG POST


Traditional grading involves manual calculations and repeated adjustments.
But with pattern grading software, the process becomes more efficient.
You can:
- apply grading rules automatically
- adjust measurements consistently
- preview different sizes instantly
- maintain design accuracy
This is why many designers rely on digital pattern grading as part of their workflow.
Step-by-Step: How to Use CAD for Pattern Grading
Let’s walk through the process step by step.
Step 1: Create a Base Pattern
Start with a well-drafted base pattern.
This pattern should be accurate and tested for fit.
Everything in digital pattern grading begins here.
Step 2: Define Measurement Rules
Next, you need to define how each size will change.
For example:
- bust increases by 4 cm
- waist increases by 3 cm
- hip increases by 4 cm
These rules guide your grading process.
WANT TO TURN YOUR CAD PATTERN DRAFTING EXPERIENCE TO REVENUE?
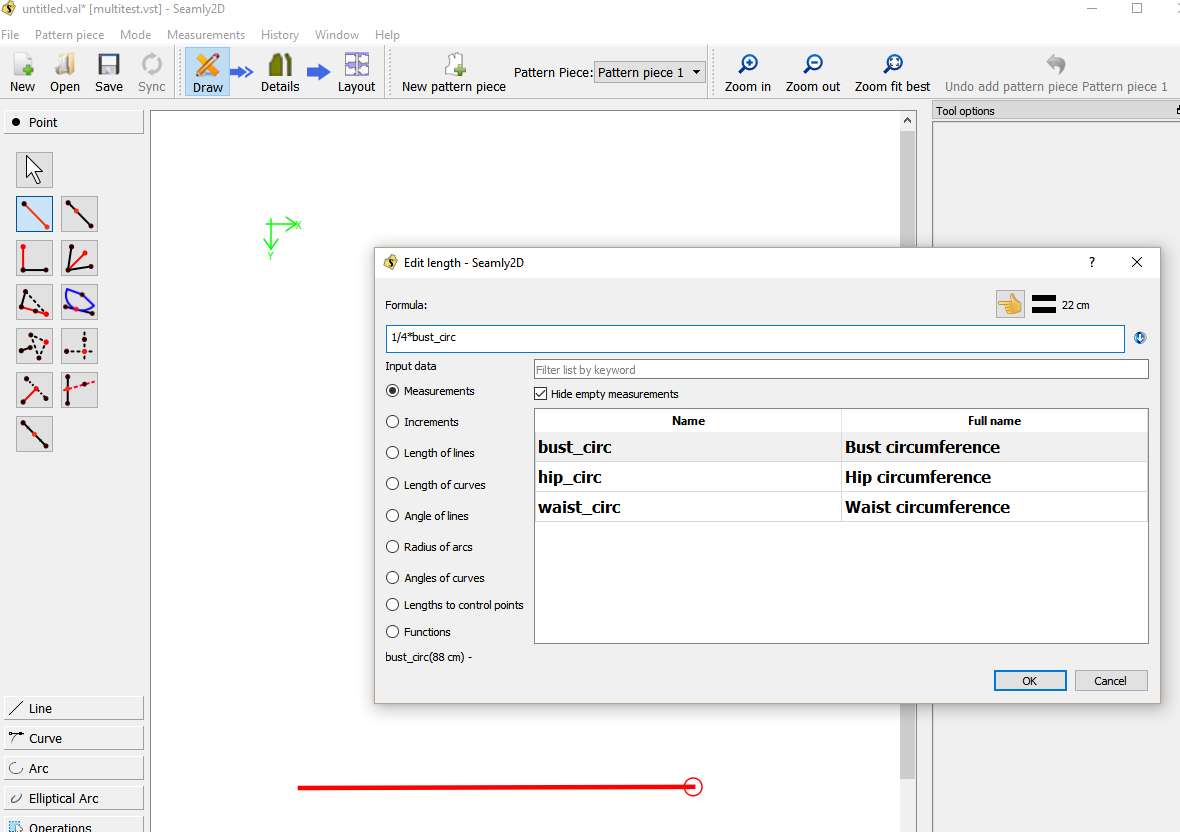
Step 3: Input Grading Values into Software
Using your pattern grading software, enter grading rules for each point.
Most CAD tools allow you to assign values to:
- horizontal changes
- vertical changes
This creates a structured grading system.
Step 4: Apply Grading to Pattern Pieces
Once your rules are set, apply them to your pattern.
The software will automatically generate new sizes.
This is where fashion CAD grading becomes powerful.
Instead of redrawing patterns, the software does the work for you.
CLICK TO BUY MY DIGITAL PATTERNS
Step 5: Review and Adjust
Even with digital tools, you should always review your graded patterns.
Check:
- balance
- proportions
- alignment
Small adjustments may be needed.
Step 6: Export and Save
Finally, save your graded patterns.
Now you have a complete size range ready for production.
Common Mistakes in Digital Pattern Grading
When learning sewing pattern grading, beginners often make these mistakes:
- using incorrect grading rules
- ignoring body proportions
- scaling patterns without checking fit
- skipping testing
Avoiding these mistakes will improve your results.
Best Pattern Grading Software for Designers
Some popular pattern grading software options include:
- Seamly2D
- Valentina
- Gerber AccuMark
- Optitex
- Lectra
Each tool supports digital pattern grading, but the best choice depends on your workflow.
The Deeper Insight Most Designers Miss
Here’s something worth thinking about.
Pattern grading is not just about resizing.
It’s about preserving design integrity across sizes.
A well-graded pattern ensures that every size
- looks balanced
- fits correctly
- maintains the original design
This is what separates beginner work from professional results.
Let Me Ask You Something
Are you designing for one person…
Or for many?
If your goal is to scale your designs, then mastering digital pattern grading is not optional.
It’s essential
Practical way of How to Use CAD to Create Perfectly Graded Sewing Patterns
Creating sewing patterns that fit beautifully across multiple sizes is one of the biggest challenges in fashion design.
Traditionally, grading patterns by hand required time, precision, and years of experience.
Today, with tools like Seamly2D, Gerber AccuMark, and Lectra Modaris, designers can achieve fast, accurate, and scalable results using pattern grading software.
If you’re a beginner or even an experienced designer, learning how to use CAD for digital pattern grading can transform your workflow and elevate your designs.
What is Pattern Grading in Fashion?

4
Sewing pattern grading is the process of increasing or decreasing a base pattern to create a range of sizes. Instead of drafting each size from scratch, you use a master pattern and apply consistent measurements to scale it up or down.
In modern fashion design, fashion CAD grading allows you to:
- Maintain proportional accuracy
- Apply grading rules automatically
- Reduce human error
- Speed up production workflows
Why Use CAD for Pattern Grading?


4
Using CAD tools for digital pattern grading offers major advantages:
1. Precision and Consistency
CAD software applies exact grading rules across all pattern points, ensuring every size maintains the intended fit.
2. Time Efficiency
What used to take hours manually can now be done in minutes using pattern grading software.
3. Easy Adjustments
Need to tweak a size? CAD lets you modify grading rules instantly without redrawing the entire pattern.
4. Scalability for Production
Perfect for designers planning to sell patterns or produce garments at scale.
Step-by-Step: How to Grade Sewing Patterns Using CAD
Step 1: Create Your Base Pattern
4
Start by drafting your base size (often size M or 38). This is your reference pattern.
👉 Tip: Ensure your base pattern is perfect before grading—errors will multiply across all sizes.
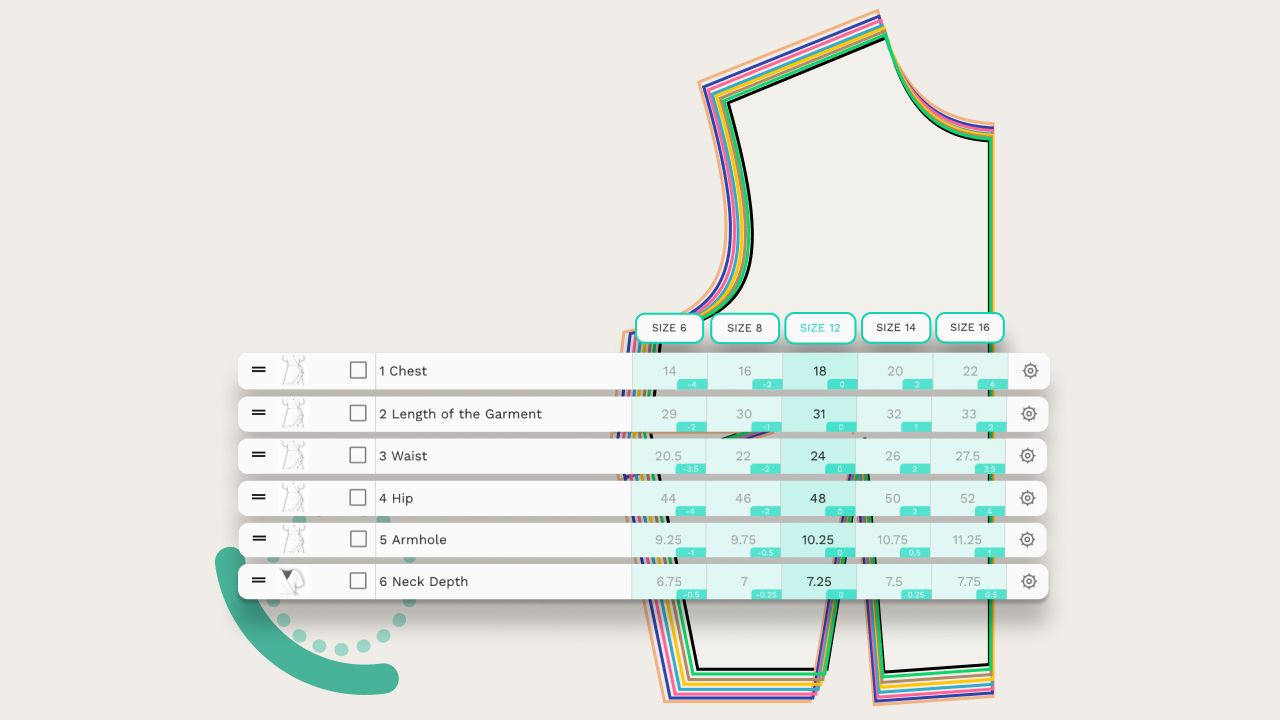
Step 2: Define Grading Rules

4
Grading rules determine how each part of the pattern changes between sizes.
Typical grading increments include the following:
- Bust: +2–4 cm per size
- Waist: +2–4 cm
- Hips: +2–4 cm
Most fashion CAD grading tools allow you to assign these values to specific points (e.g., shoulder, armhole, side seam).
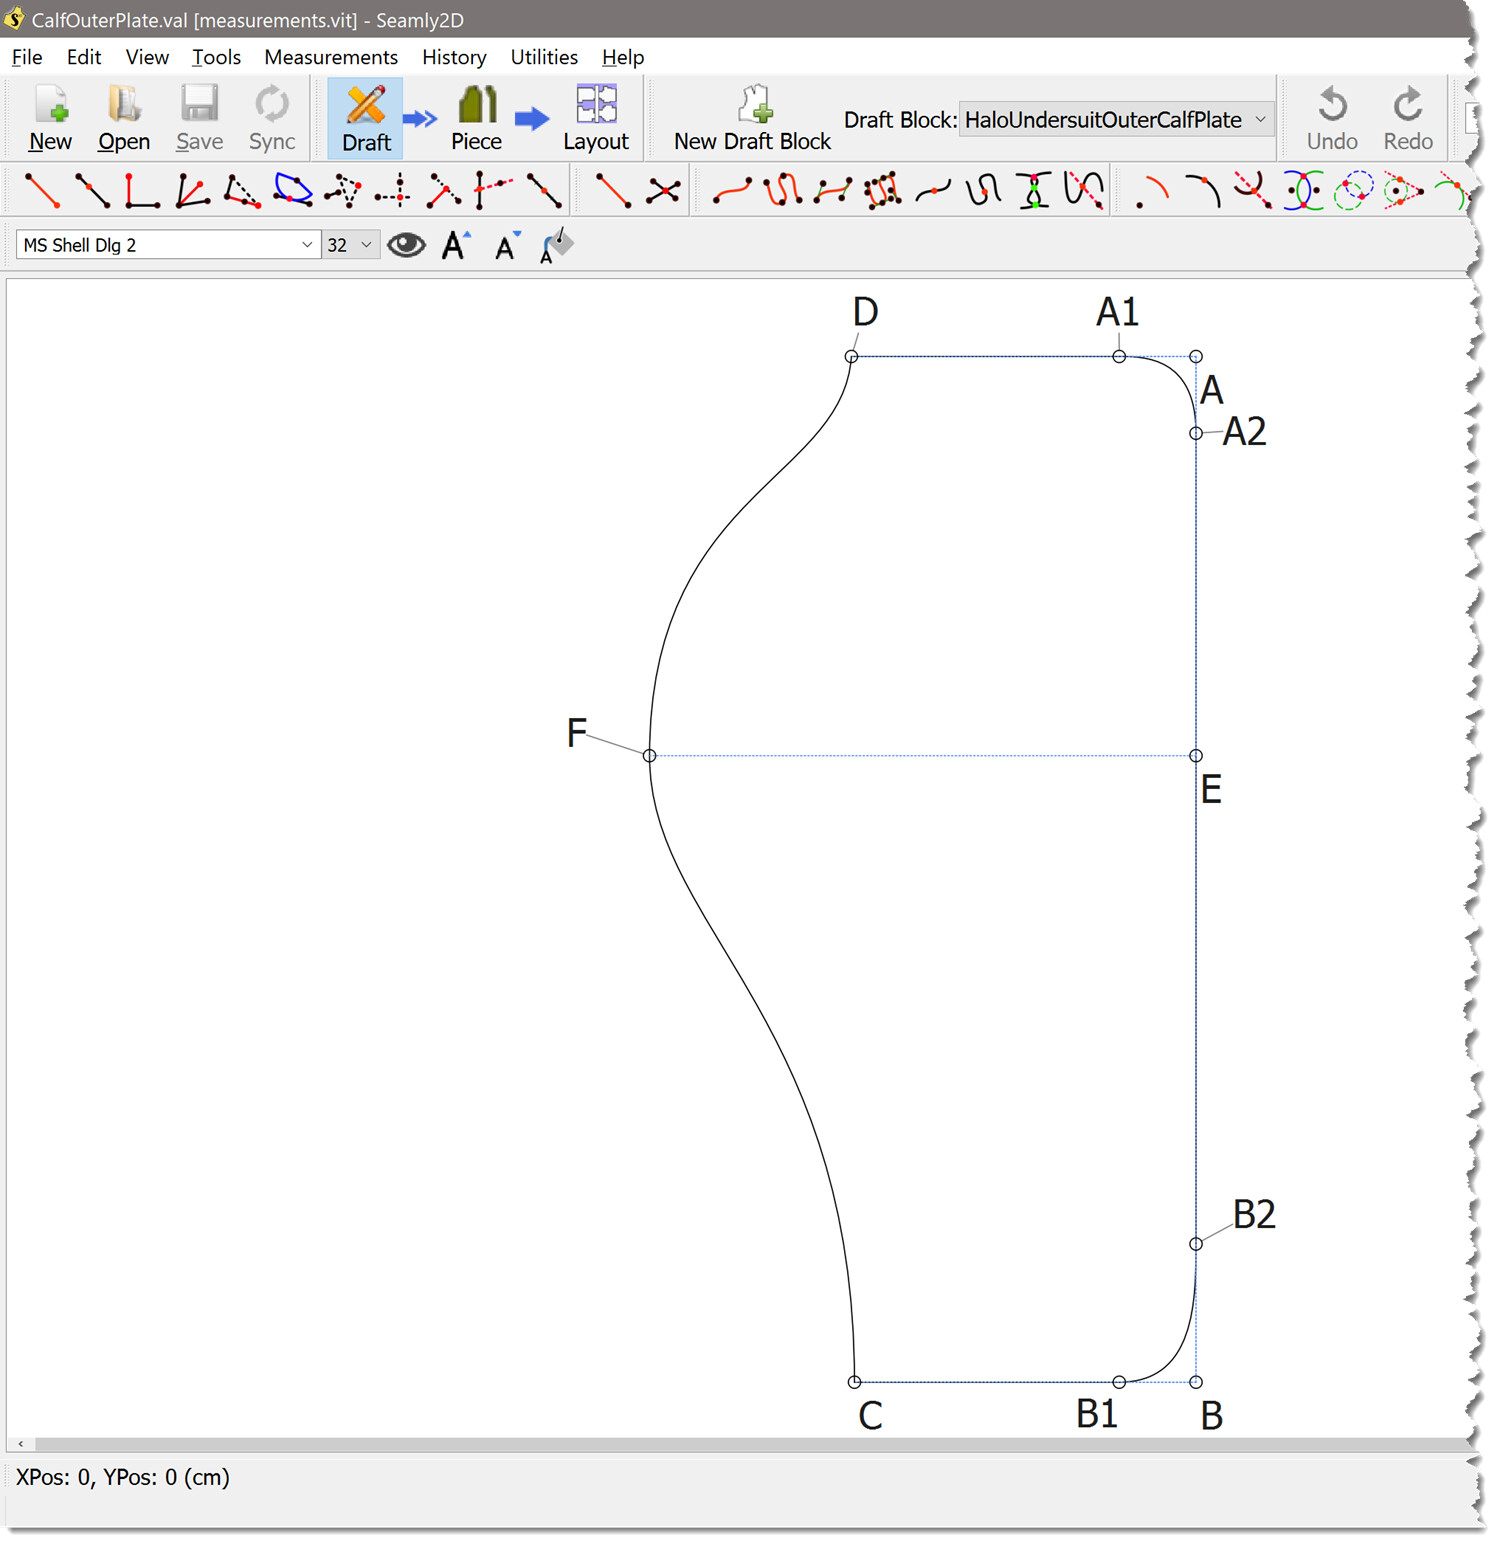
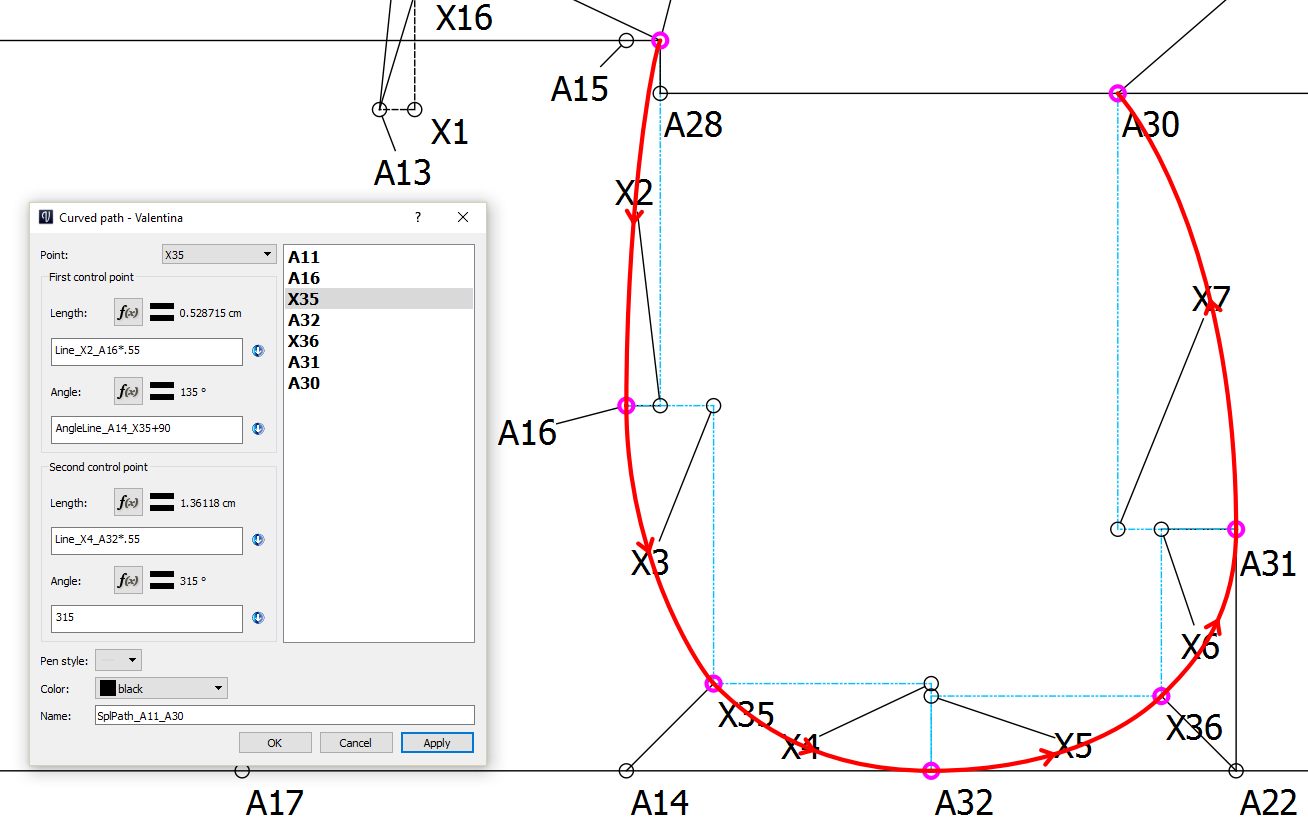
Step 3: Apply Grading to Pattern Points
4
In your CAD software:
- Select grading points (nodes)
- Assign X (horizontal) and Y (vertical) increments
- Apply rules across all sizes
This is where digital pattern grading shines—everything updates automatically.
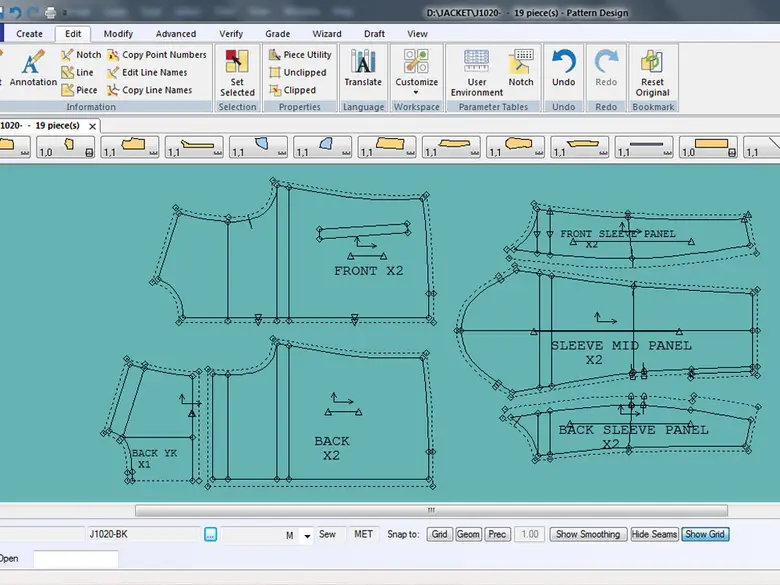
Step 4: Generate Multiple Sizes

4
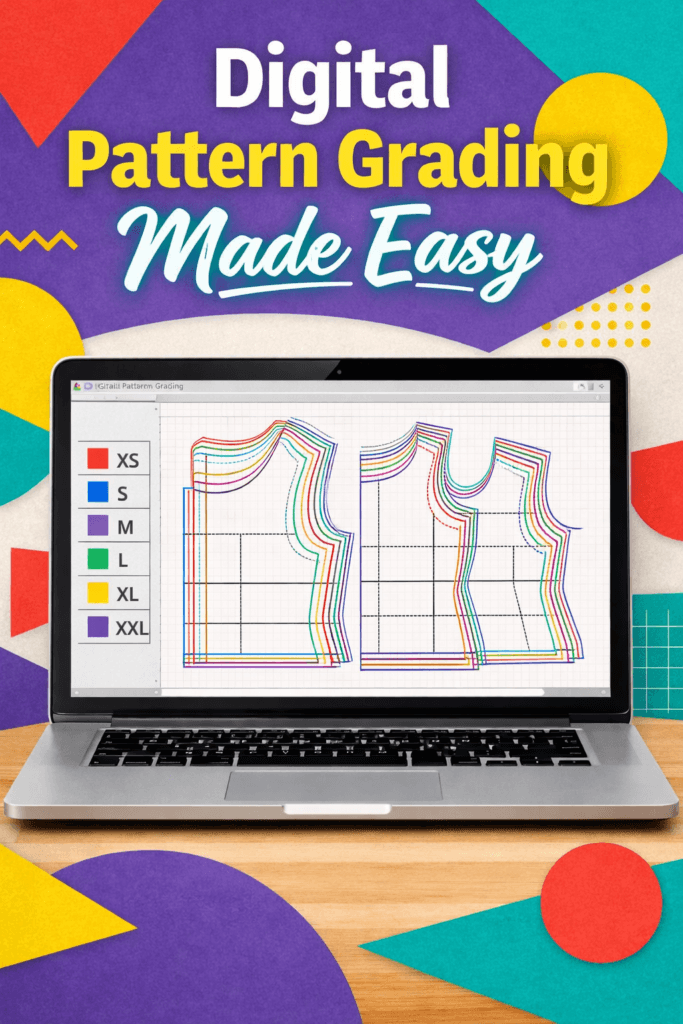
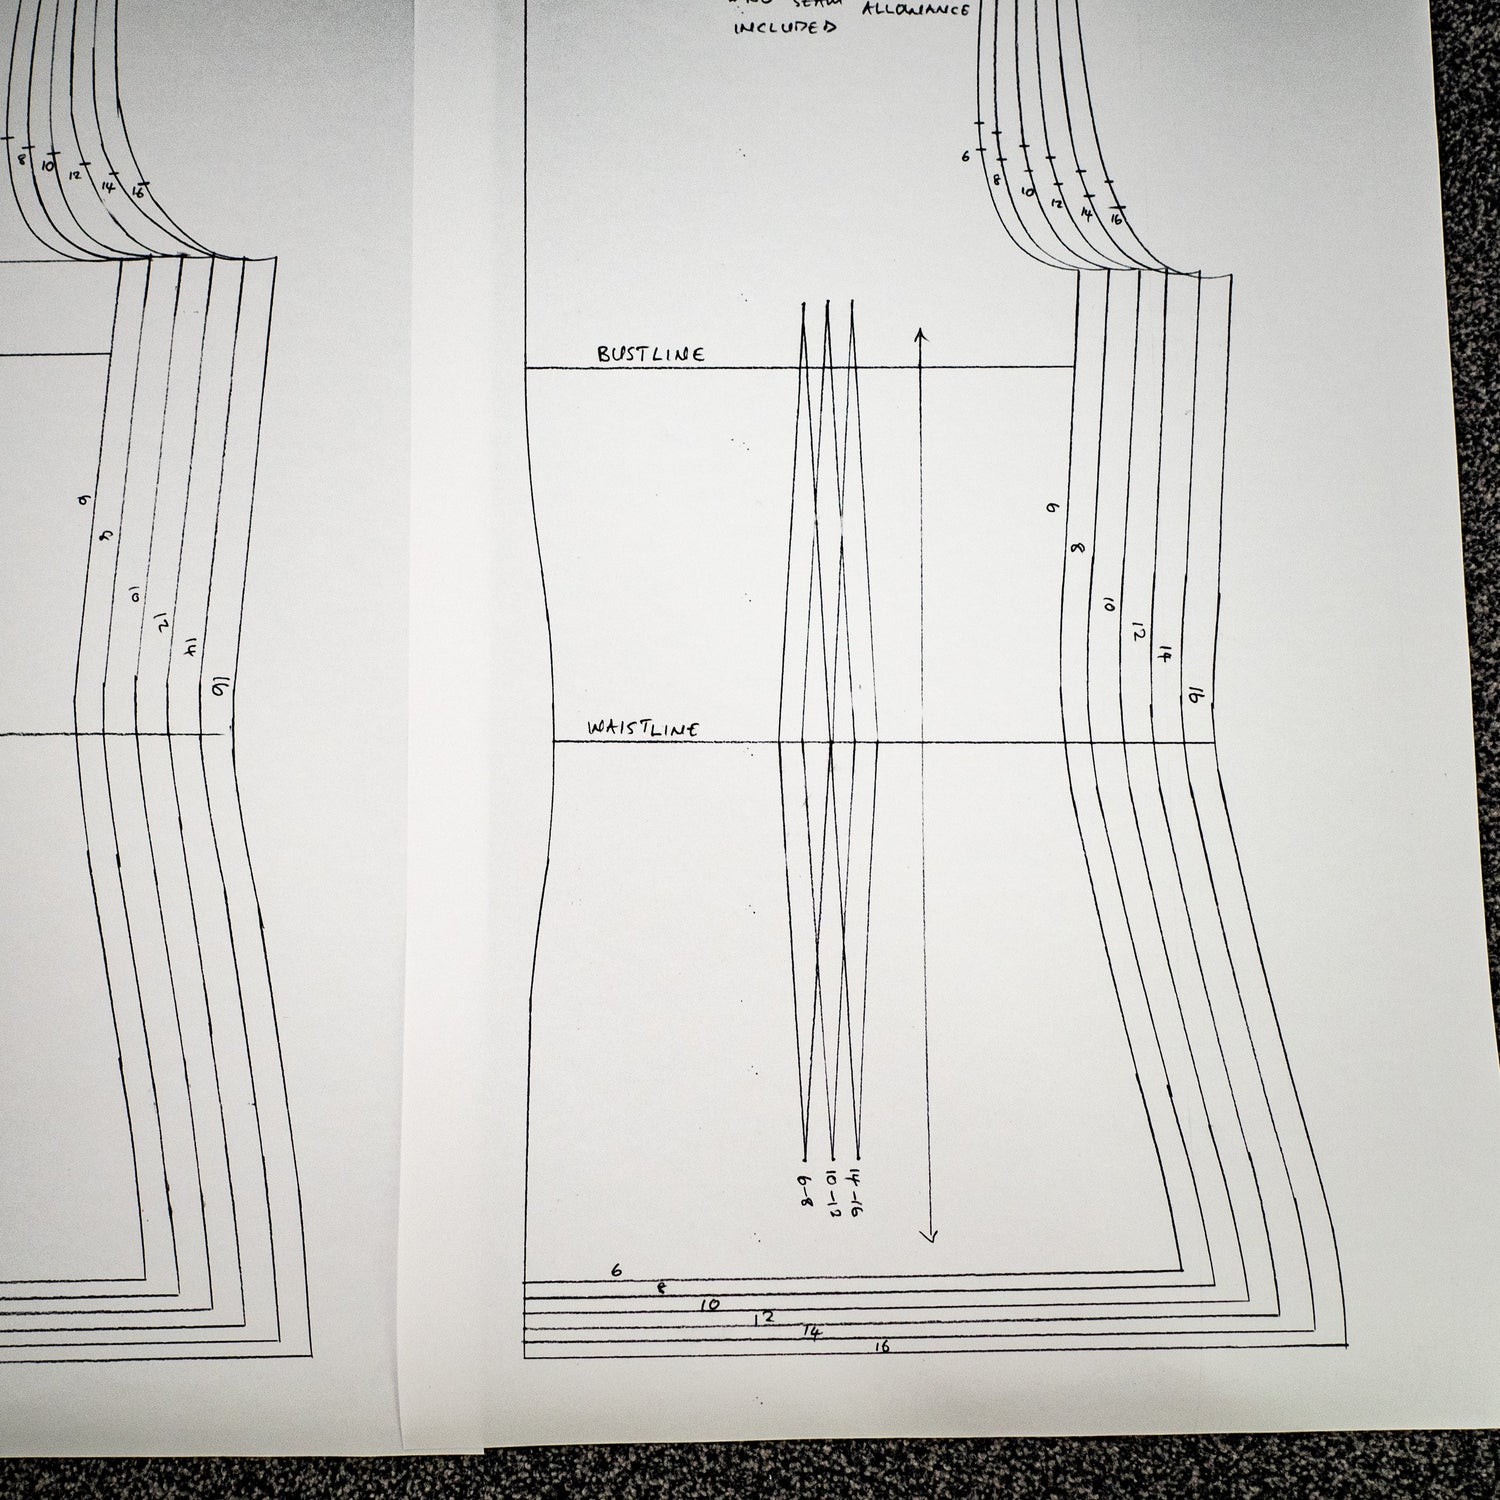
With one click, your software will generate a full size range (e.g., XS–XL).
You’ll see nested patterns where each size is layered for easy comparison.
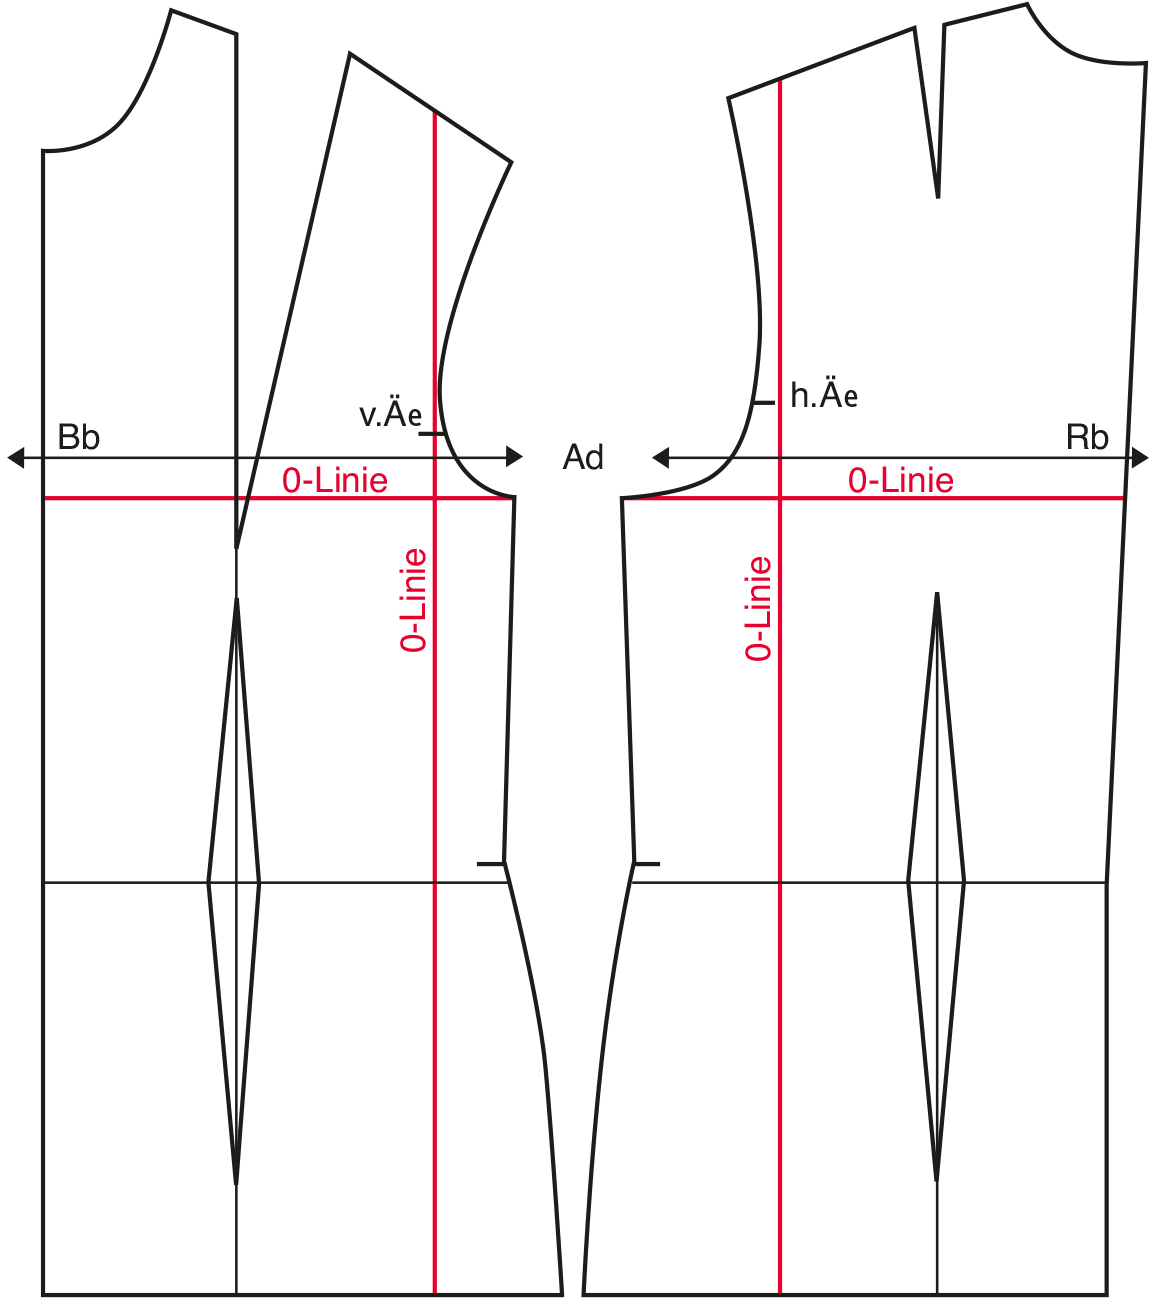
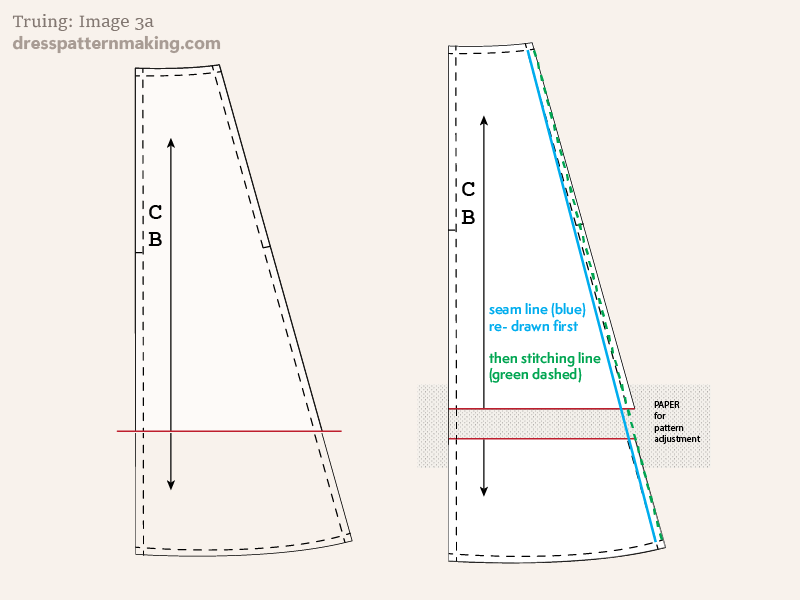
Step 5: Check and True the Pattern

4
WATCH THIS VIDEO TO GRADE YOUR PATTERNS THE SIMPLE WAY
Always verify:
- Seam lengths match
- Curves are smooth
- Dart positions remain proportional
Even the best pattern grading software needs human quality control.
Best CAD Tools for Pattern Grading
Here are some popular tools for sewing pattern grading:
- Seamly2D – Free and perfect for beginners
- Gerber AccuMark: Industry standard for production
- Lectra Modaris – Advanced grading and automation
Pro Tips for Perfect Grading
- Always start with a well-fitted base pattern
- Use standard sizing charts (or create your own brand sizing)
- Avoid overgrading sensitive areas like armholes and necklines
- Test your graded patterns by sewing sample garments
Common Mistakes to Avoid
- ❌ Grading without a proper size chart
- ❌ Ignoring body proportions (grading is not just scaling)
- ❌ Skipping pattern testing
- ❌ Over-relying on automation without checking results
Final Thoughts
Conclusion
Learning how to use CAD for digital pattern grading can completely transform your workflow.
Instead of struggling with manual adjustments, you can create accurate, scalable patterns with confidence.
With the right pattern grading software and a clear fashion CAD grading system, you can design for multiple sizes while maintaining quality.
And that is one of the most valuable skills any fashion designer can develop today
Mastering digital pattern grading with CAD is a game-changer for modern fashion designers. Whether you’re creating patterns to sell online or preparing garments for mass production, using fashion CAD grading tools ensures accuracy, efficiency, and professional results.
If you’re serious about scaling your sewing or fashion business, learning how to use pattern grading software is not optional—it’s essential.
FAQ
What is digital pattern grading?
Digital pattern grading is the process of creating multiple sizes from a base pattern using CAD software.
Which software is best for pattern grading?
Seamly2D, Optitex, and Gerber are popular pattern grading software options.
Is CAD necessary for pattern grading?
While not required, CAD makes grading faster, more accurate, and easier to manage.
Can beginners learn digital pattern grading?
Yes, beginners can learn using simple tools and step-by-step practice.