In this blog post,I will be showing you how to create a double welt pocket for your female blazer.
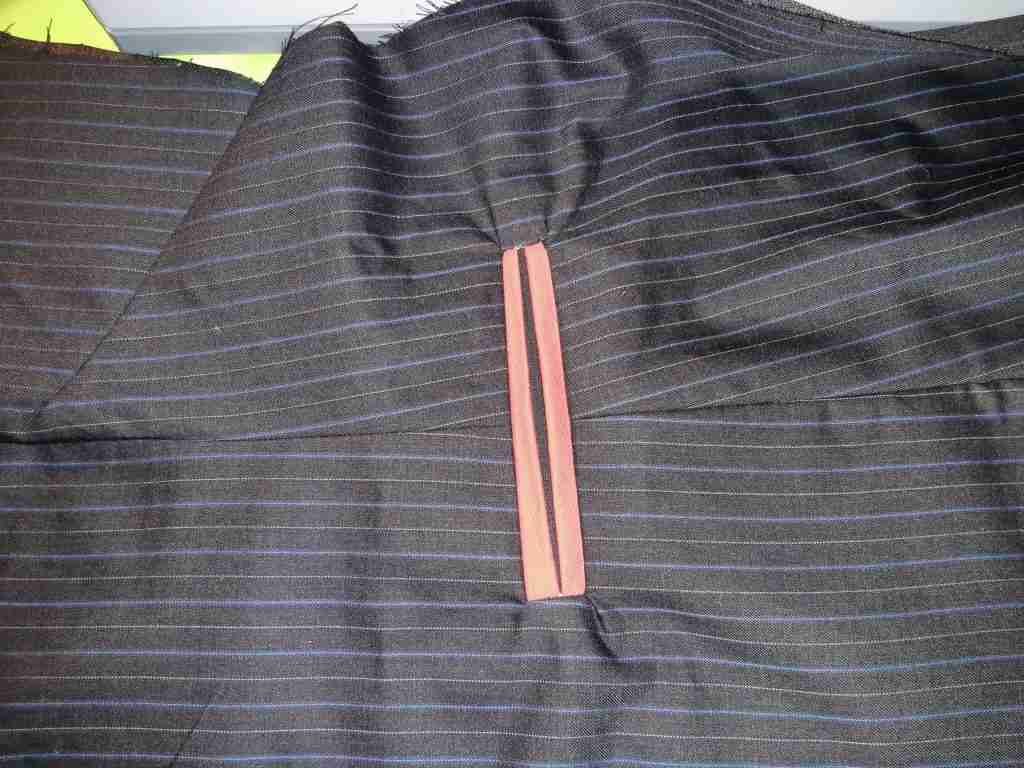
The picture below,shows you exactly what we are going to create.
Without much ado let’s go straight and start.
ITEMS NEEDED FOR A FEMALE BLAZER WELT POCKET
The very first thing you need to do, is to cut out three sets of materials.
The first is your contrast material. This is what you’re going to use to create the opening of the welt pocket.
The measurements for the contrast material is 8 cm by 18 cm.
Once you cut it out, iron on a hard fusible fleece. After that , cut
out the fusible fleece the same 8 by 18cm.
Then you cut out the material of your blazer. This is the material that you used for your blazer. Make it 18 cm by 33 cm
Those are all the materials that you really need to make the blazer welt pocket.
PREPARING THE MATERIALS FOR THE DOUBLE WELT POCKET
Get the contrast material and your feasible fleece. Fold it to equal parts.
This is to get the center point for the width and for the length.
Once you have the center point ,we are going to draw a 14 centimeter line .That is 7cm on either side of the center.
Do same for the fusible fleece.

On both end of the vertical 14cm line,draw a 2cm horizontal line.
Draw it such that you have one centimeter on each side of the vertical line.
Below is what you have at the end of the day . Join the 2cm lines together with vertical lines.
That is what you should have on your contrast material and on your fusible fleece.
CREATING THE BASE OF THE BLAZER DOUBLE WELT POCKET
Get the front piece of your blazer.
You might want to check out the pattern drafting and complete sewing of the female blazer .
Once you have the front part of your blazer, measure your shoulder to waist level. and add 2cm.
If you are using inches, add 1 inch.
At that extra 2 cm point, draw a 14 cm line. I am drawing mine at 46 cm.
That is because my shoulder to waist is 44 cm.I then added 2 cm to give me 46 cm.
Let your princess cut be the centre of the 14 cm line.
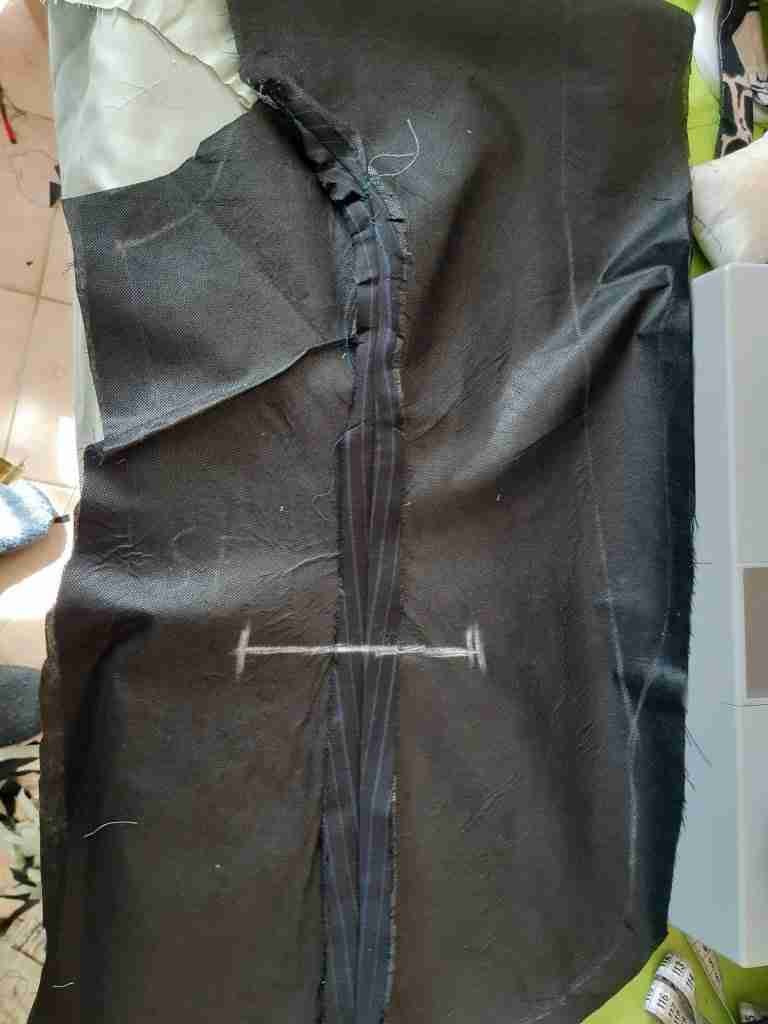
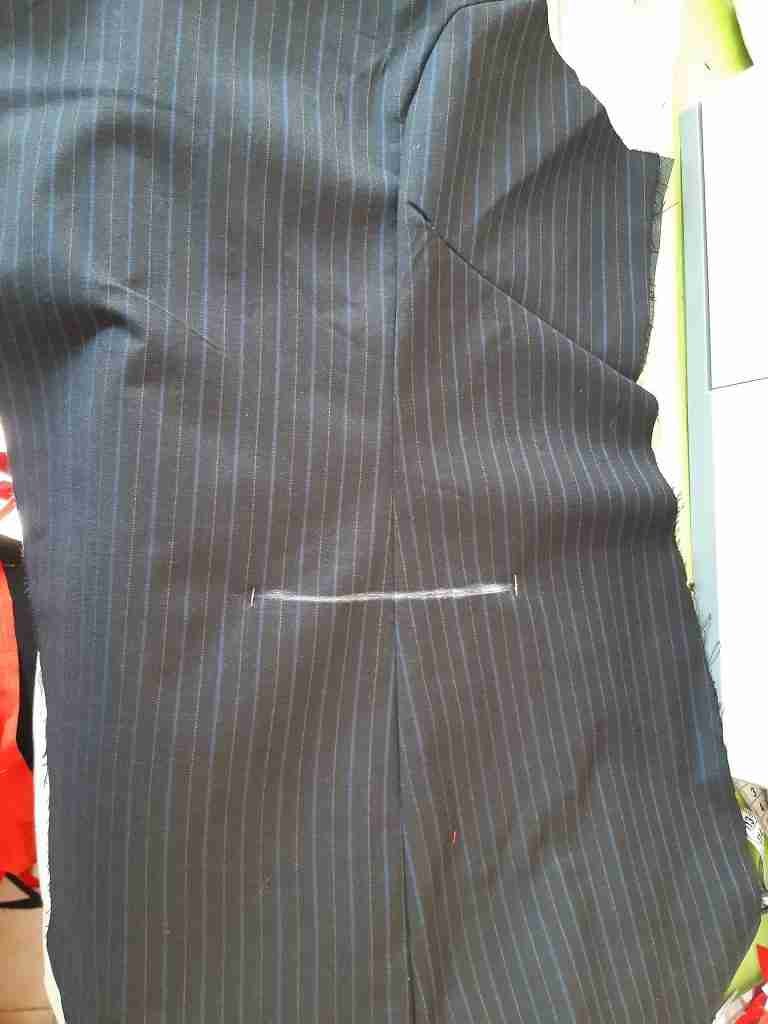
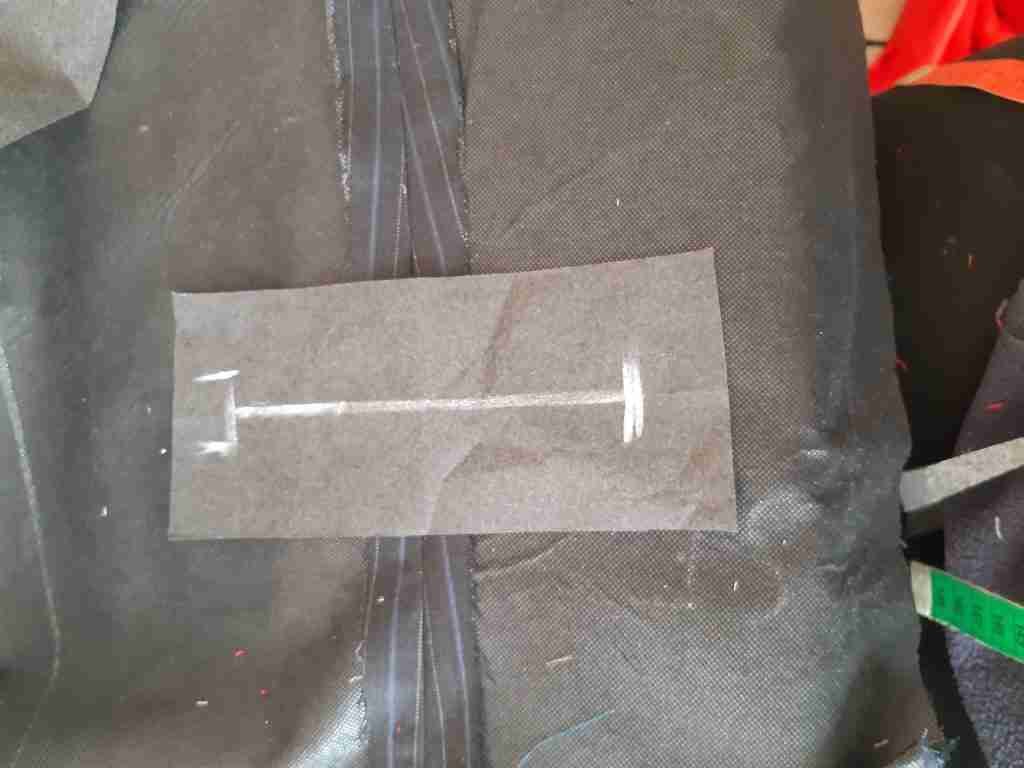
Next, get hold of your fusible fleece and iron on the blazer material.
Ensure that the 14cm lines align together. Then go ahead and iron the fusible fleece on the blazer.
Once you’re done with that,
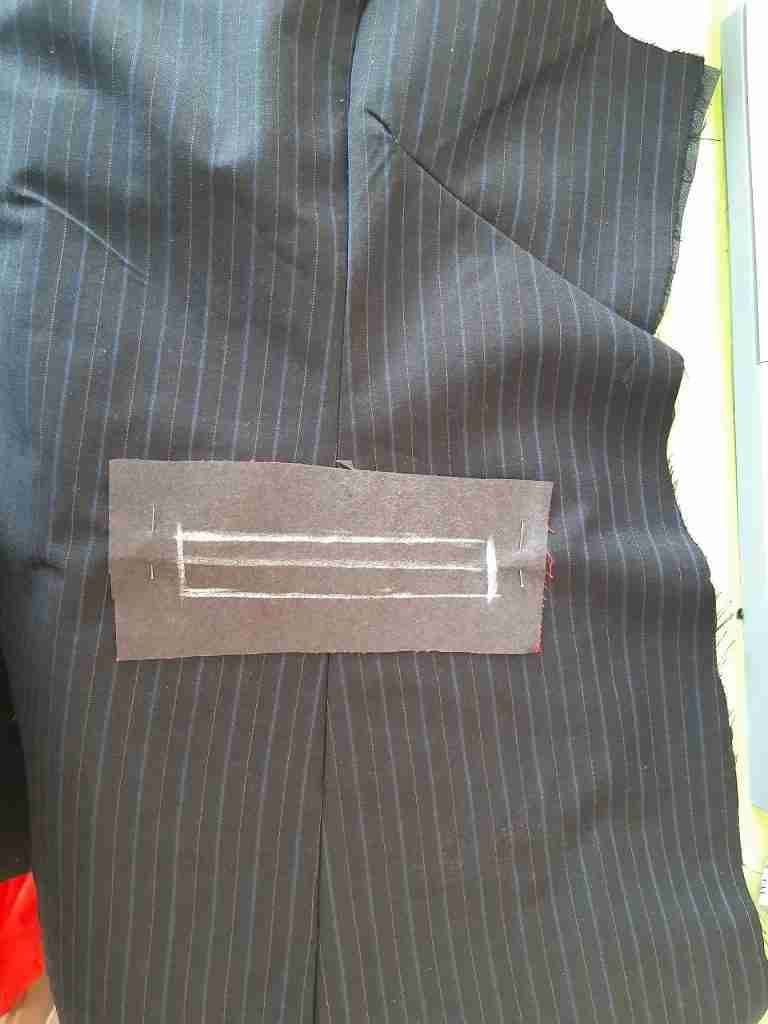
Turn to the front and place contrast material in the same position. Ensure once again that the 14-cm lines align well.
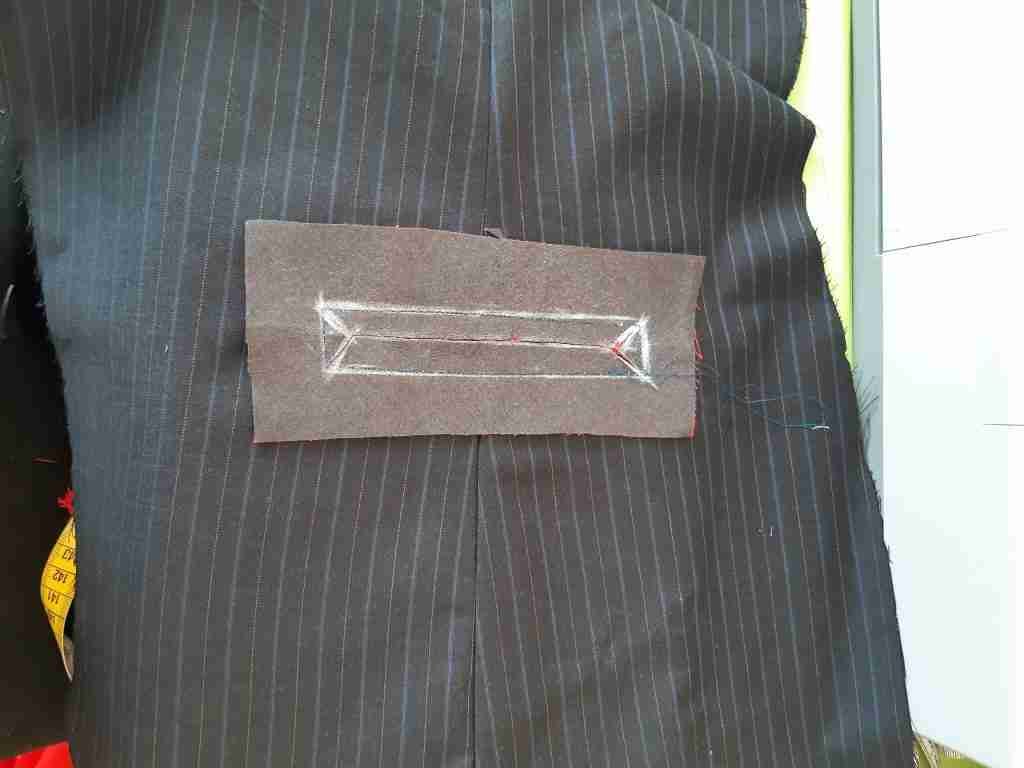
We are going to stitch along the rectangle we had drawn earlier
CREATING THE WELT POCKET OPENING
To open up the welt pocket, get a dressmaker’s scissors and cut through the centre line dividing the sewn rectangle.
Also cut along the drawn small rectangle at both ends.
After cutting through, the above picture is what your double welt pocket should look like.
When doing this for the first time, try not to cut through your seam . Be very careful.
It might be better to use a buttonhole scissors for this.
Sometimes if you’re doing it the first,time it’s good to use a thread colour you can see.The next thing to do is to
FORM THE DOUBLE WELT POCKET
Turn the contrast material through the cut hole to the back of the BLAZER
Then iron it down very well. I have ironed down my pocket.
Your pocket should be looking like this for now.Don’t worry, we are going to close it up.
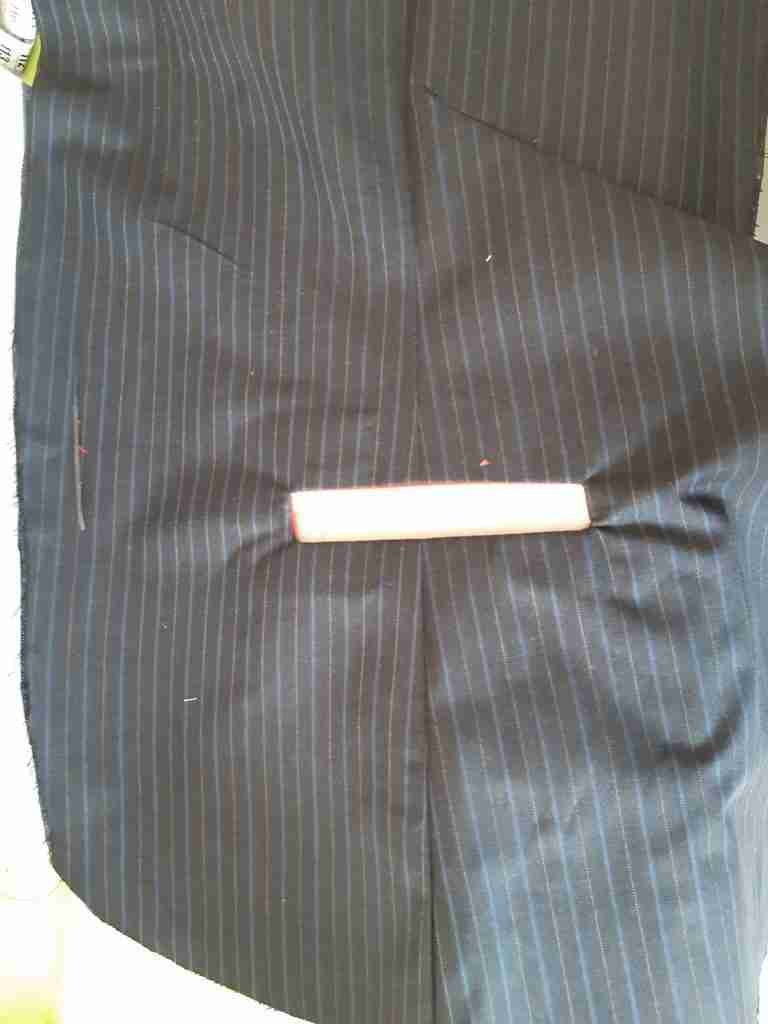
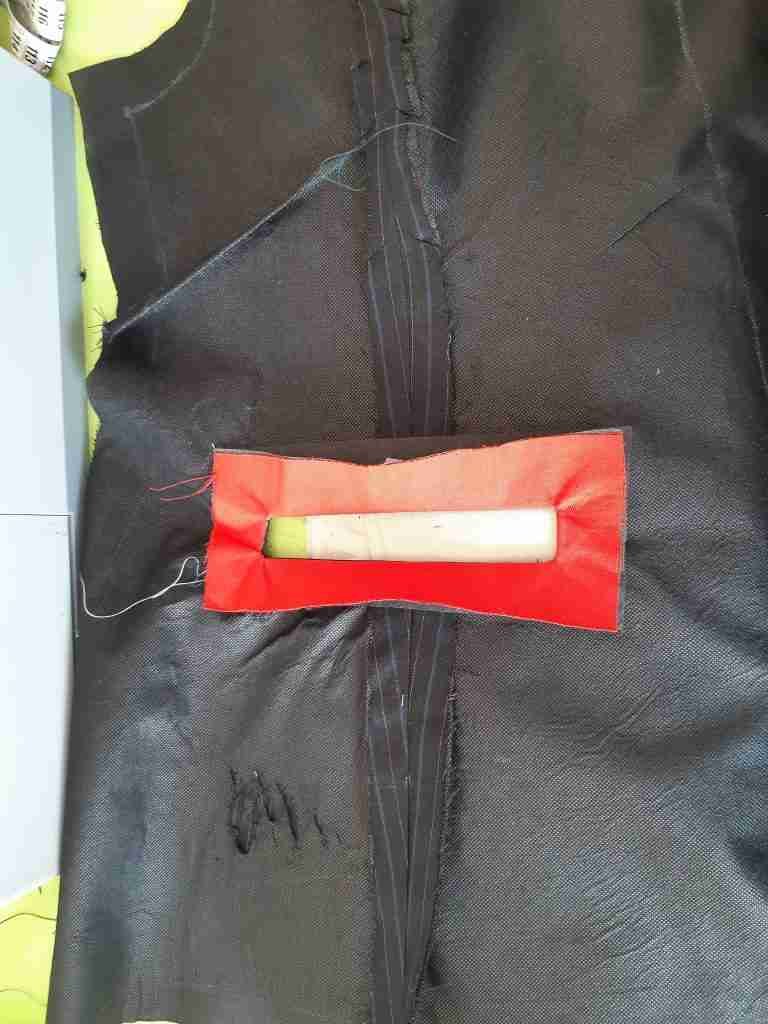
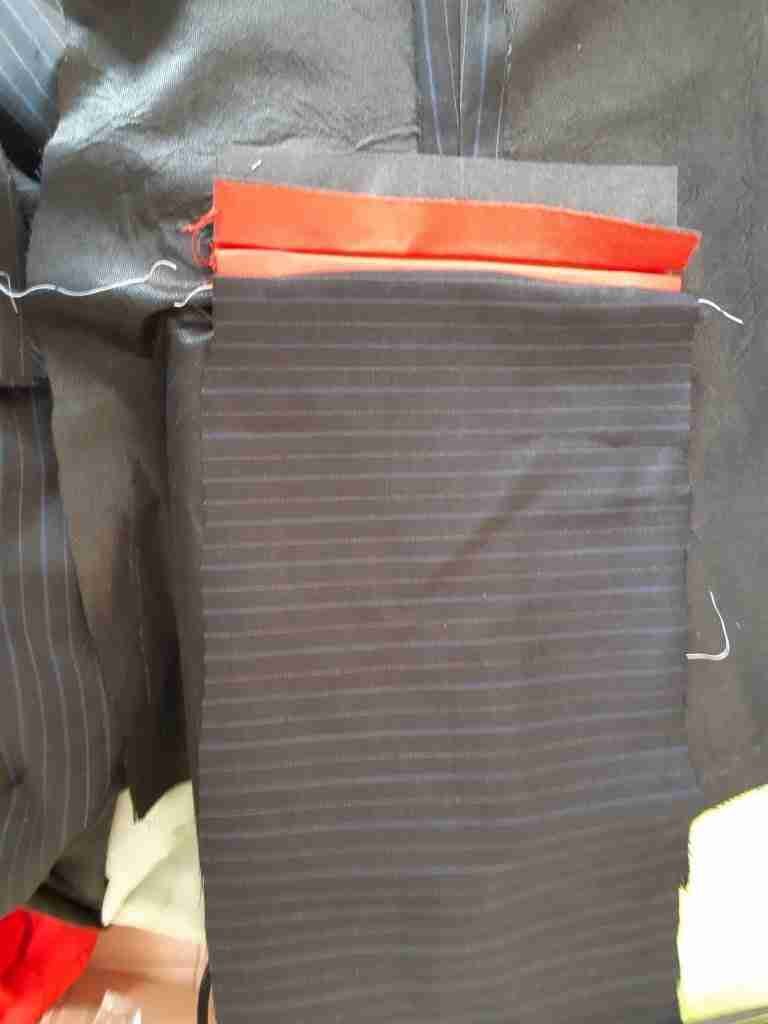
Turn to the back of your jacket pocket. Get your 33 by 18 cm blazer material piece.
Sew the 18-inch end of the material at the bottom part
of the contrast material. After that.Feel free to watch the full video below.
Once you’re done with the sewing, this is what it looks like.
FORMING THE DOUBLE WELT POCKET OPENING CONTINUED.
So now we are going to cover the opening. Turn your cloth over and then adjust and try to cover half of the space with the contrast material.
Ensure that the blazer material doesn’t come out.Try and bring the contrast material to cover the remaining half of the space.
After ironing and pinning down, this is what your bag should be looking like at
the back and front.
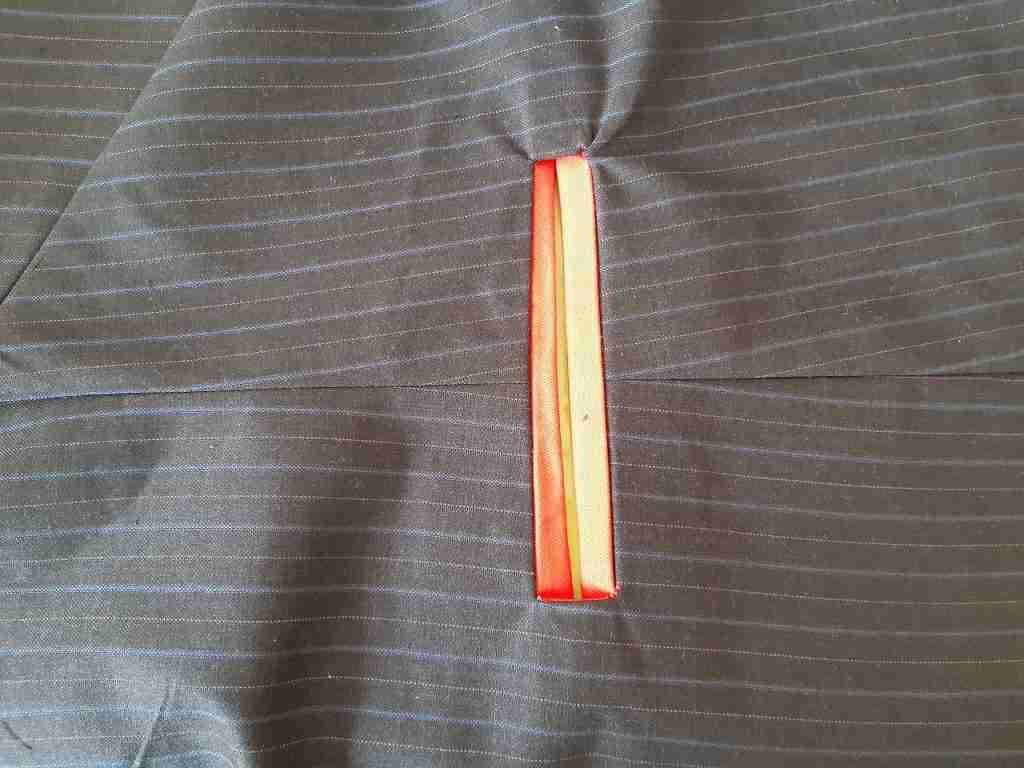
We are going to sew so that the folding will remain in place. The pictures below show you how to position your materials to sew.
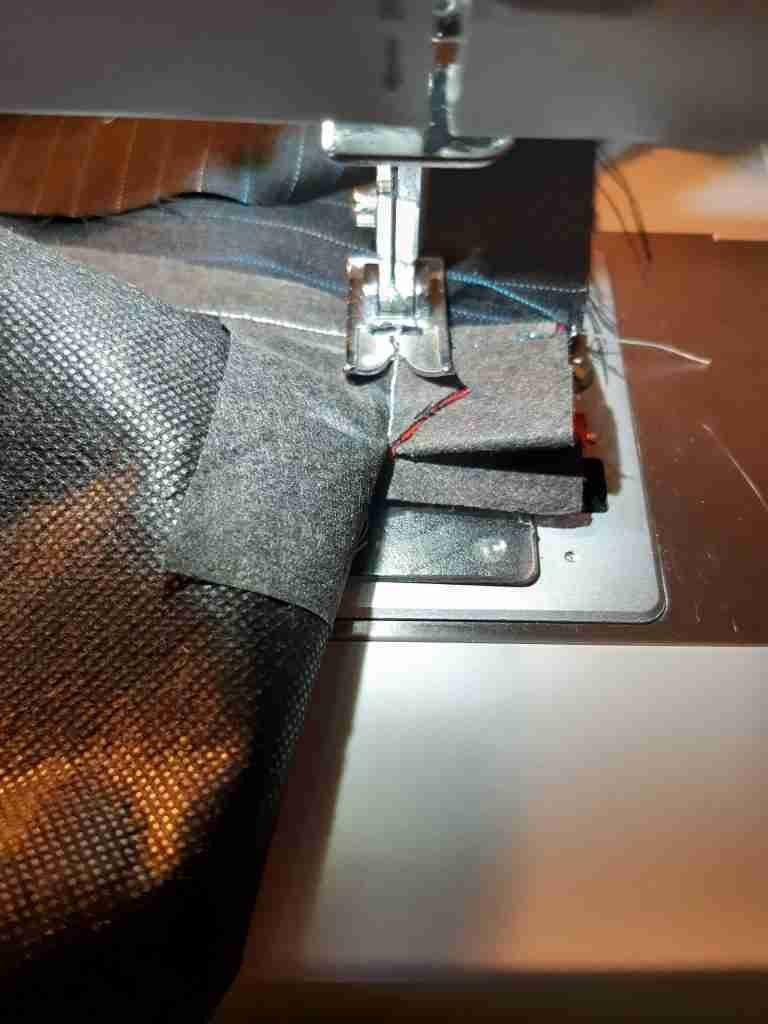
To actually understand how to sew it perfectly, please watch the video below
After the sewing, you can see your double welt pocket has taken its shape in the front.
CREATING THE ACTUAL POCKET BEHIND
What you’re going to do next is to actually form the pockets where you can put your hands.
Or put whatever you want to put.
Take the 33 by 18 piece at the back part of your welt pocket.
Fold it forward and then sew it onto the upper part of the contrast material.
After that, we’ll now sew the sides. Please don’t sew the sides on your blazer.
Just hold it separately and just sew down
When you’re done with the sewing on the sides this is what the back pocket should be looking like.

DIFFERENT TYPES OF WELT POCKETS
There are different types of welt pockets .And different ways to sew them/
There are essentially four different types of welt pockets and they include:
- Single-welt pockets. These welt pockets has a single welt.
- Double-welt pockets. Similar to the single welt pocket, double welt pockets have double welt.This blog post is all about creating a double welt pocket.
- Faux-welt pocket.
- Zippered-welt pocket.This is just a double welt pocket with a zipper
CONCLUSION
We have eventually come to the end of creating our double welt pocket.As I said before, if you want to see how I eventually finished the blazer, you can watch video here.
Thank you so much for reading to the end. if you have any challenges.
Drop your messages in the comments, and I’ll get back to you. Remember
it might not be perfect the first time but keep trying and watch the
video several times and you will get it right. Do you have a simpler way of creating your welt pocket? Let’s hear about it.
Dont forget to share and follow me on pinterest.

